In late April, I was browsing the internet. On Wimp.com I found an interesting clip.
Puzzle Box clip
I thought it looked like something fun to do, which I could give as a Christmas present to a few people. I headed to a place that sold hardwood, and spent a pile of $$ to get a pile of wood, including American Walnut, Maple, Birch, Alder, Monkey Pod, Peruvian Walnut, and a few others. I planned the project and, in late May, I began cutting the first box, using American Walnut for the top and Monkey Pod for the base.
Almost a month later, I was finally able to slide the top onto the base. The joint was terrible, with gaps of up to 1/8” in width. The problem was that I was unable to see where the piece was jamming.
I have done a fair amount of hand cut dovetail work. When I do one of those, I cut the joint too tight, then shave away the pieces that overlap, until the joint closes. On the puzzle box, the points of contact were buried inside the box. I could not tell if the jam was happening on the left or the right, at the end or in the middle. So, I shaved and sanded, shaved and sanded, until I got it together.
It was so bad that I was going to throw it out, but I set it aside to think about it. With a little inspiration, I went out and got a bunch of paper type nail files. I put one in one of the 4 slot sides and closed the box until the box began to press on the nail file, then I worked the nail file back and forth, sanding the pieces where they were binding. I also cut a long piece of wood at the same side slope as the slots. I laminated some sandpaper to it and used it like a file to make the surface cut by the nail file more uniform. I worked all four sides this way until I had a joint that seemed nearly uniform in its 1/8” gap. I then took a piece of the Peruvian Walnut and planed it down to a 1/8” thickness and glued it in place as a shim.
The fit still was not good, certainly not to my usual standard, but it was better, maybe acceptable. I cut out the interior, put on the base, and began sanding, 5 full weeks after starting the work.
I decided not to do any more puzzle boxes.
BUT – I had all this wood. So, I made another, more conventional box, with standard dovetail corners. Joinery time, 2 days. That was fast enough that the two pieces could be varnished at the same time.

About this time, I saw some pics of turquoise being used as a filler for cracks in walnut. I liked the look, so I did initials filled with turquoise for the recipients.
A word about the finish… I did a hand rubbed varnish finish. The way this is done is a thin coat of varnish is applied and allowed to dry. Sand most of it off, then do another coat. Repeat until the pores and grain in the wood is completely filled. You know this when the sanded surface no longer has any shiny spots showing. On the walnut, that took about 4 coats. On the maple used in the second box, it took 3 coats. The monkey pod was at 7 coats before it came up uniform.
When the finish is filled and completely smooth, do a final coat. Let it dry thoroughly, then sand using progressively finer wet/dry sandpaper, starting with 600 grit and working down to 7000 grit. Finally, using a wet felt pad and rottenstone, do the final rubbing to bring up the shine.
Yep – the finish takes a lot of time and effort, but the result is so far beyond a brushed or sprayed finish that it simply is not comparable. It would be like comparing the coarsest burlap to the finest silk. The surface feels like glass to the touch.

By the time I was completing the finish, I was planning a box for my niece. I had gotten some wood from another woodworker that he called zemboli (that’s phonetic – I have no idea of the actual spelling, and was not able to find it on the internet). To me, it looks sort of like zebrawood. I decided to use it to make a box with a bookfold joint. This is done by splitting a board in two, making the edges perfect, and gluing the two pieces together so it looks as if you have opened the board like you open a book.
So, I started with a board.

I cut pieces to the length I needed and split them.


It worked. I did two of those, one for the top and one for the bottom. I added maple and walnut trim on the top to create a flange and to dress it up a bit. I then did the sides with a traditional dovetail and put the sides and bottom together.
Box joined
Time for the finish.


Next piece – I did a Yin and Yang symbol for a couple for whom it would have some meaning.

I then did a plaque with an inlay of Kokopele, the southwestern native American god often called the flute player or the giver of life, as a gift for my nephew.

I did a Christmas tree ornament for another friend, and had leftover wood but no ideas.

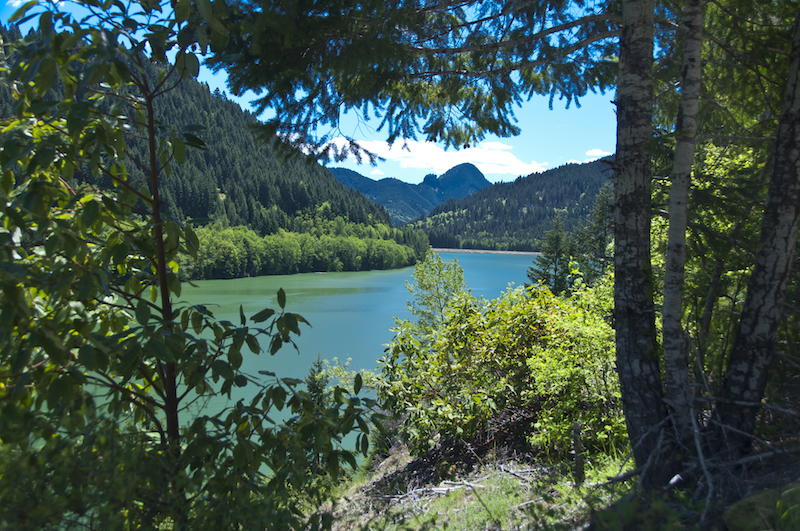
By now, it was the latter part of August. I interrupted my woodworking efforts long enough to see something special.

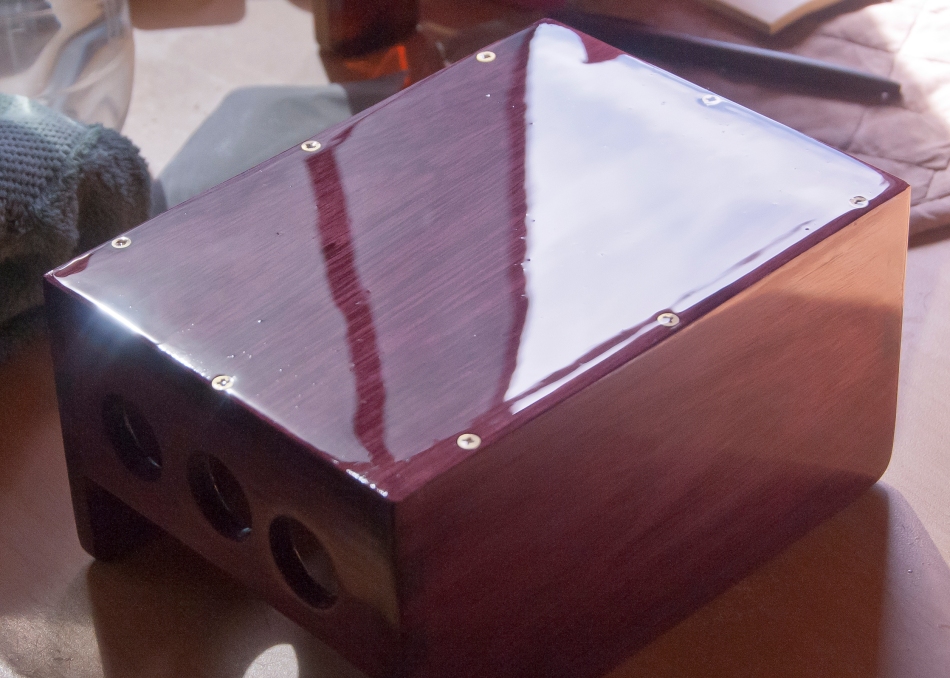
I still needed ideas, and had none. I wanted to give my sister-in-law something using a remarkable wood called purple heart. It was given to me by that woodworker in Wyoming. It is beautiful, a rich, natural purple in color, is very hard wood, is hard to work, and is hard to finish. I finally got a suggestion to make a USB charging station for her, and realized this was it – it would be something both attractive and useful, and I had the skills and tools to make it happen.
I cut the wood and did the joinery – some of the best dovetailing I have ever done. I began the finish. For some unknown reason, something about the varnish, the wood or the brushes, on coat number three, the varnish would curdle.

I would sand it off and start again, only to have it happen again and again. After about 4 tries, I finally got the sides and top to be not perfect, but acceptable. The bottom was another story. As a sizable flat surface, any flaws really stood out. I was running out of time, and what I was getting was simply not acceptable. I sanded the bottom down to raw wood and began applying coats of lacquer spray finish. I did three coats and let them dry for two days, then sanded and did two more coats. After fine sanding, the result was pretty good, but there were five small spots, either from bubbles or dust, that I was not happy with.
You can’t apply lacquer over varnish. The solvents will cause the varnish to wrinkle. BUT – you can put varnish over lacquer. I brushed on a coat of varnish to fill and hide those air bubbles.
It curdled.
In desperation, I scrubbed the varnish onto the surface, rather than doing slow, smooth strokes. I then finished with the long smooth strokes to remove the thousands of tiny air bubbles I had created with the scrubbing. It worked.
For a while. I began rubbing out the finish. It looked great. A few days later, wrinkles began to appear in the varnish.


I rubbed them out. Again, after a few days, more wrinkles showed up. I figured out that the lacquer was still off-gassing its volatiles which, on reaching the varnish, caused the finish to pucker and wrinkle. The only option was to sand off all the varnish and rub the lacquer. If I sanded too much, I would hit raw wood and have to start over. If I didn’t get the varnish off, it would wrinkle again.
On November 15, with great relief, I finally finished the USB charging station.


It was a satisfying way to spend my summer.


Recent Comments